Feelin' it out - Life-size tape floorplan
This morning a thought entered my mind that I could not shake: I have never sat in a life-sized floorplan of my house!
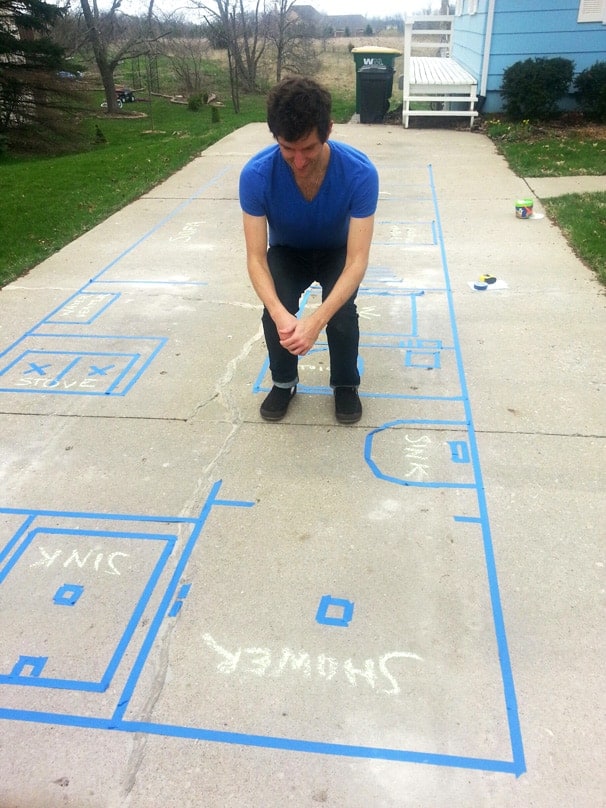
That's me, taking a pretend dump in the composting toilet
Sure, I have been in other tiny houses, and I know how much space I will be dealing with. But I have never sketched out MY floorplan and felt what the space would be like -- as I enter the house and need to find a place to store my muddy shoes. As I hang my coat and run to the bathroom, narrowly missing the corner of the sofa with my knee, and avoiding the dog's tail with my foot. Or as I head from the bathroom to the stove and navigate the kitchen to boil water for tea.
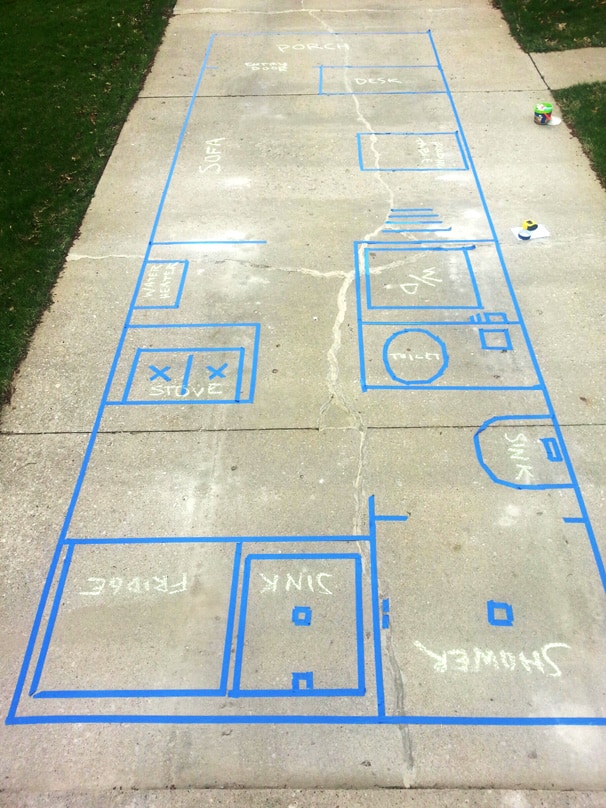
Well, no more. I have done it and I can say it was a lot of fun! It's strange, but it felt exactly like I thought it would. At first, I was freaking out, because as I laid down the first pieces of tape for the interior wall dimensions, it seemed so small. But once I proportioned out all of the space to show where everything would go, it all seemed to come together quite perfectly, and didn't feel as small as when I first started.
The morning was warm and windy. My printed floorplan dimension drawing was blowing out of my hands at every opportunity, and the painter's tape didn't stick all that well to the dirty driveway...but HOLY #$!*, how have I not done this yet!
Who here did this with their house plans before starting to build? I think it's absolutely essential to get it off the paper and into 2 or 3 dimensions in real size to make sure what worked in your head will work in real life.


I like this idea to try it on for size. The only thing that bothers me a bit is not allowing for the thickness of the walls. Probably ok in this case with few if any internal walls, but could easily be misleading with them not shown full thickness. For example if you started by building a floor the size of that outline and then erected normal thickness walls everything inside would no longer fit.
Could also use different coloured tape for walls and fittings if you were really keen 🙂
Thanks, Jim. The outside lines seen here actually represent the interior wall dimensions. I already subtracted 4 inches on each side for the thickness of the walls. The exterior wall dimensions are not shown, just to keep it simpler.
Very good job
my tiny house https://machalotte.blogspot.fr/
Hi!
Great job! However could you tell us the length and width you are working with...Smart!!! I will do the same for my tiny house as well!
Jackie
House is 8'x20', plus a 3 foot porch, making the total length 23'
Sidewalk chalk is another possibility.
Kathleen beat me to it. Sidewalk chalk vs tape wins hands down. I am building a stelth house in a 3000 sq ft pole barn. I was lucky that the poured concrete floor is finished very nicely. I laid out all the exterior with a builders chalk line and then chalk with the big chalk.
Laid out the wall thickness. I took a different color for the bed dresser and highboy chest and other pieces of furniture. I found my center partion wall left me with a 10'3" end wall. I decided to make a double center wall and utilize the void for built in storage. End walls are now 9'6" eliminating all butt joints in the 10" drywall.
By carefully laying out this footprint it gained me 112 sq feet of storage and eliminated the extra work of finishing multiple drywall joints.
Just did the same thing with my floorplan a few weeks back. I didn't have a nice level, paved surface like you, but it was fun and helpful nonetheless. Thanks for the great idea!
https://www.tinyprocesshouse.com/posts/my-tiny-house-in-tape/
Thanks, Alek, that means a lot coming from you. Your blog has been a fantastic resource for me so far and your design was one of my inspirations. Love your birch plywood interior and the woods you used throughout. I may try whitewashing the plywood to let a bit of the grain show through. If all else fails, I know the solid white walls will look good, though 🙂
I will be doing this in the spring when the snows gone and will be using chalk. I think it's a great, and fun, exercise to do before shelling out any cash. It will really help me "see" what I'm getting myself into!