Progress Update: Subfloor Framing Done!
It's been a while since my last post, and that's for good reason: now that I have all the materials I need to get started, I've been busy building instead of blogging!
Over the past week I've accomplished a lot:
- I moved the trailer into its indoor location, propping it up on jack stands and leveling it.
- I received a huge lumber order with 2by's, plywood and all the other various odds and ends needed for framing.
- I measured, cut and fit all subfloor framing pieces and screwed them together, pre-drilling each hole.
- I then took off the framing (assembled in 3 pieces) and applied aluminum flashing to the entire underside of the trailer, nailing down with flat roofling nails, caulking all nails and seams. (Careful measuring and cutting was needed to leave exactly enough flashing sticking out each side to wrap around and nail to the side of the frame, once placed back on the trailer).
- I moved each framing section back onto the trailer (very hard with one person, as they are heavy!), once again checking for level and square.
- I secured the subfloor framing to the trailer deck boards with 20 3/8" x 3 1/2" lag screws.
- I secured the framing to the 8 custom brackets on each side of the trailer with 3/8" bolts and lock washers.
- I measured out aspects of the floorplan, making markings for interior walls and placement of rough plumbing that will go inside this floor space.
The pictures below show the completed framing with aluminum underneath and everything bolted in place.
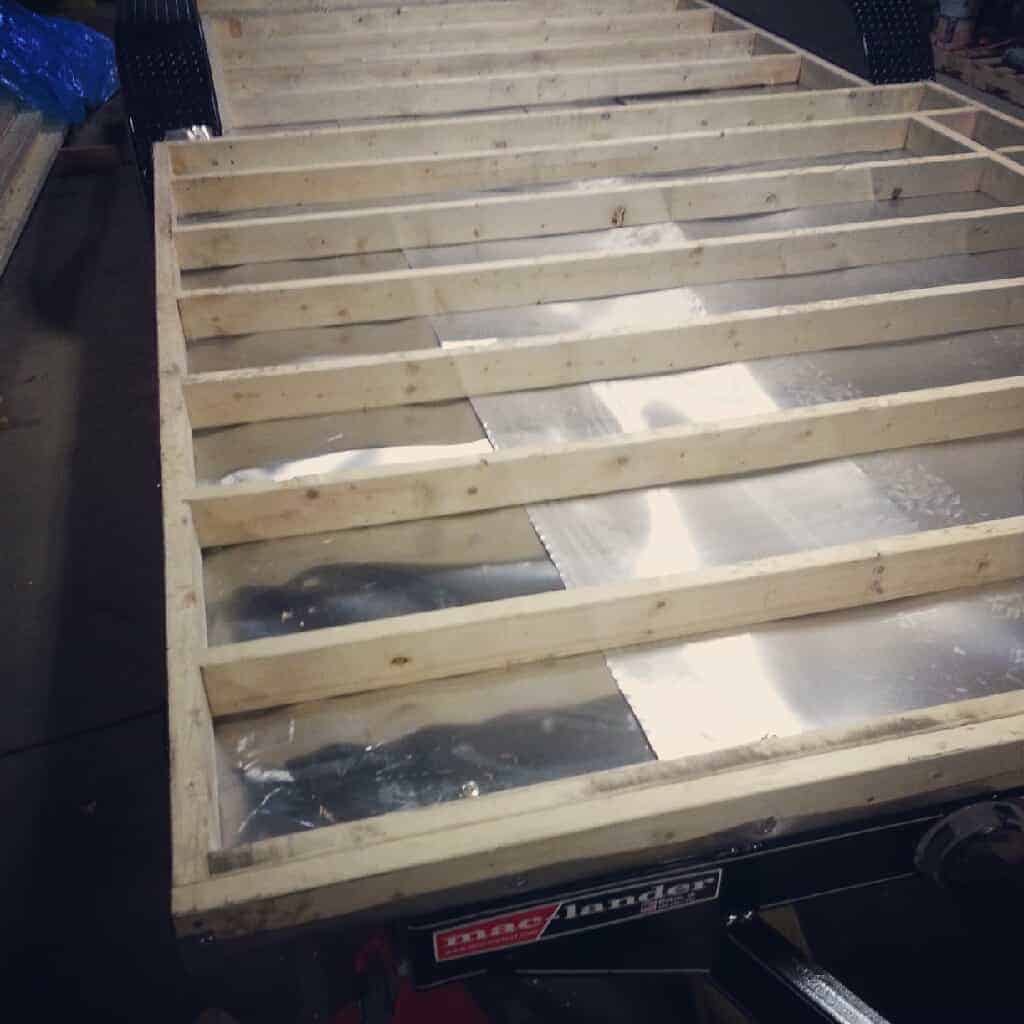
Aluminum under subfloor framing
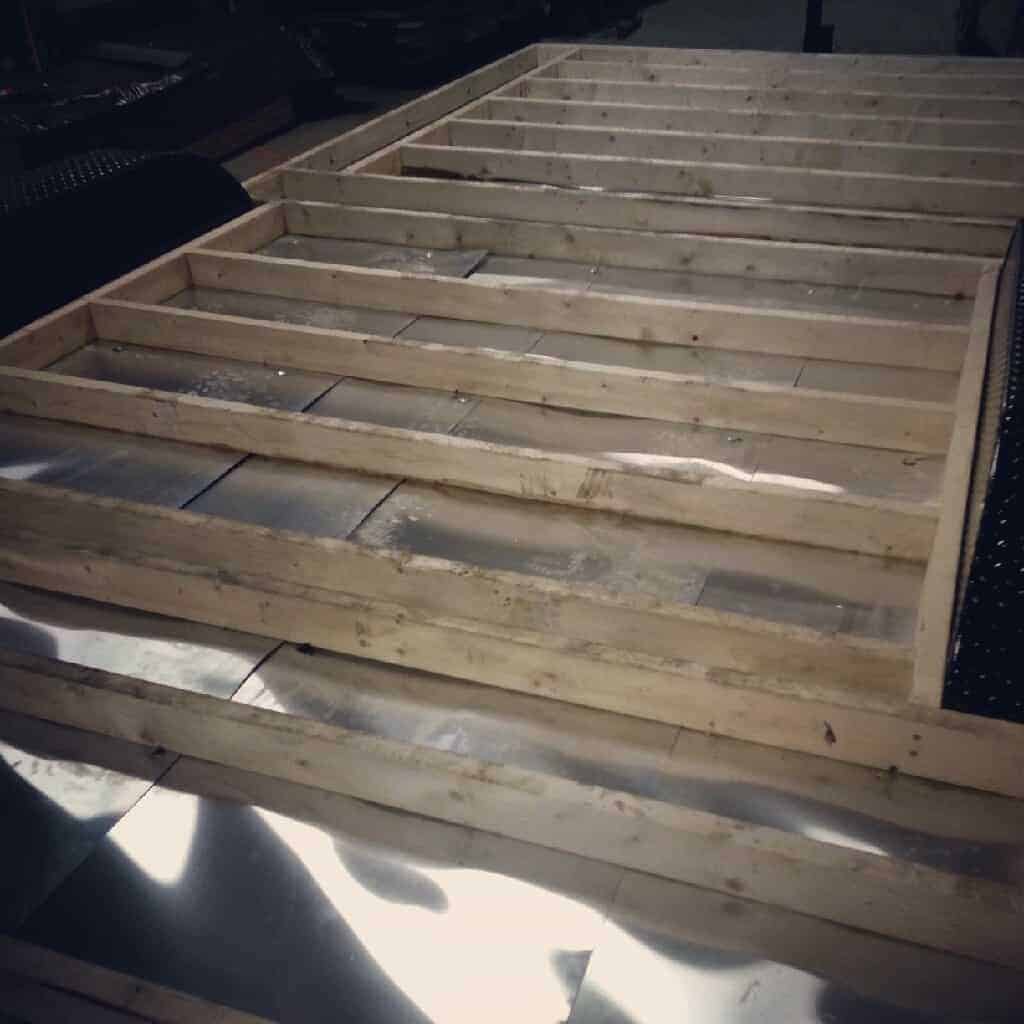
Another angle
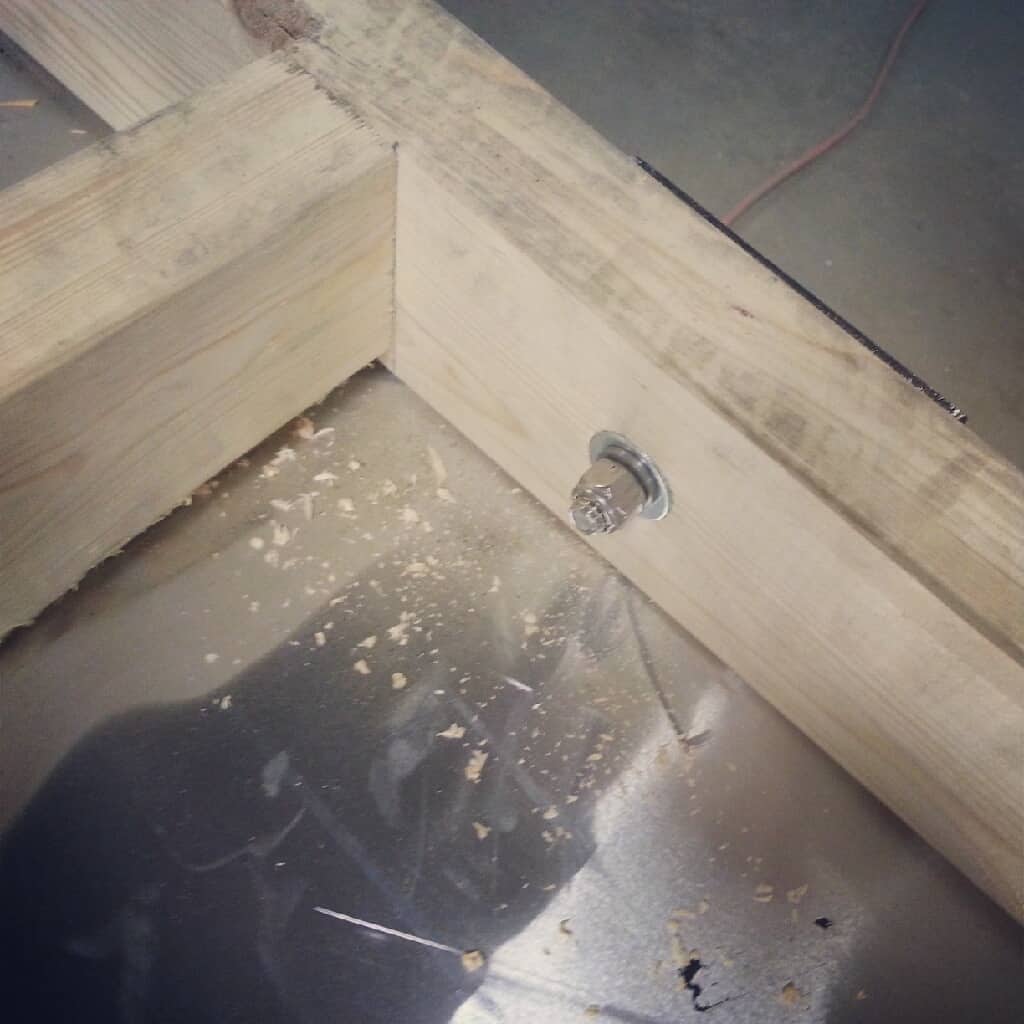
Inside bolt detail
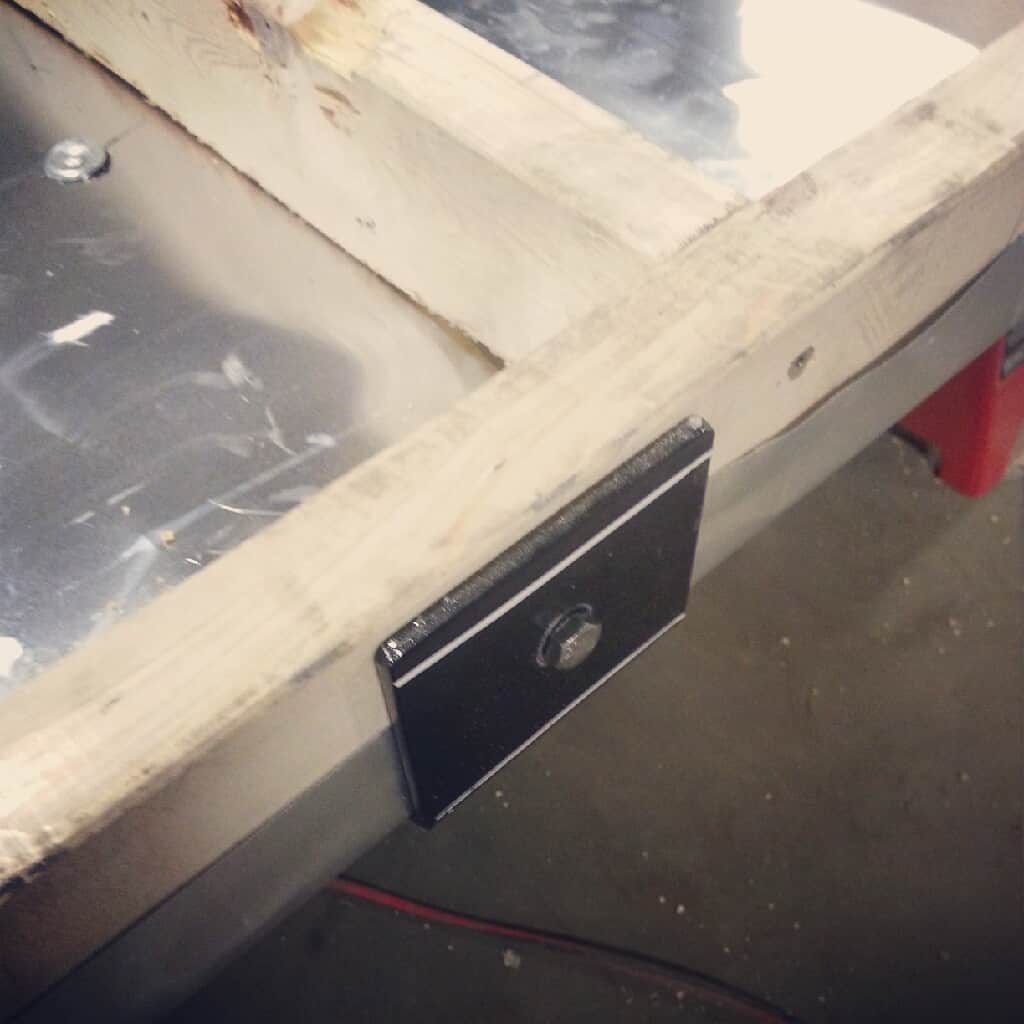
Outside bolt detail
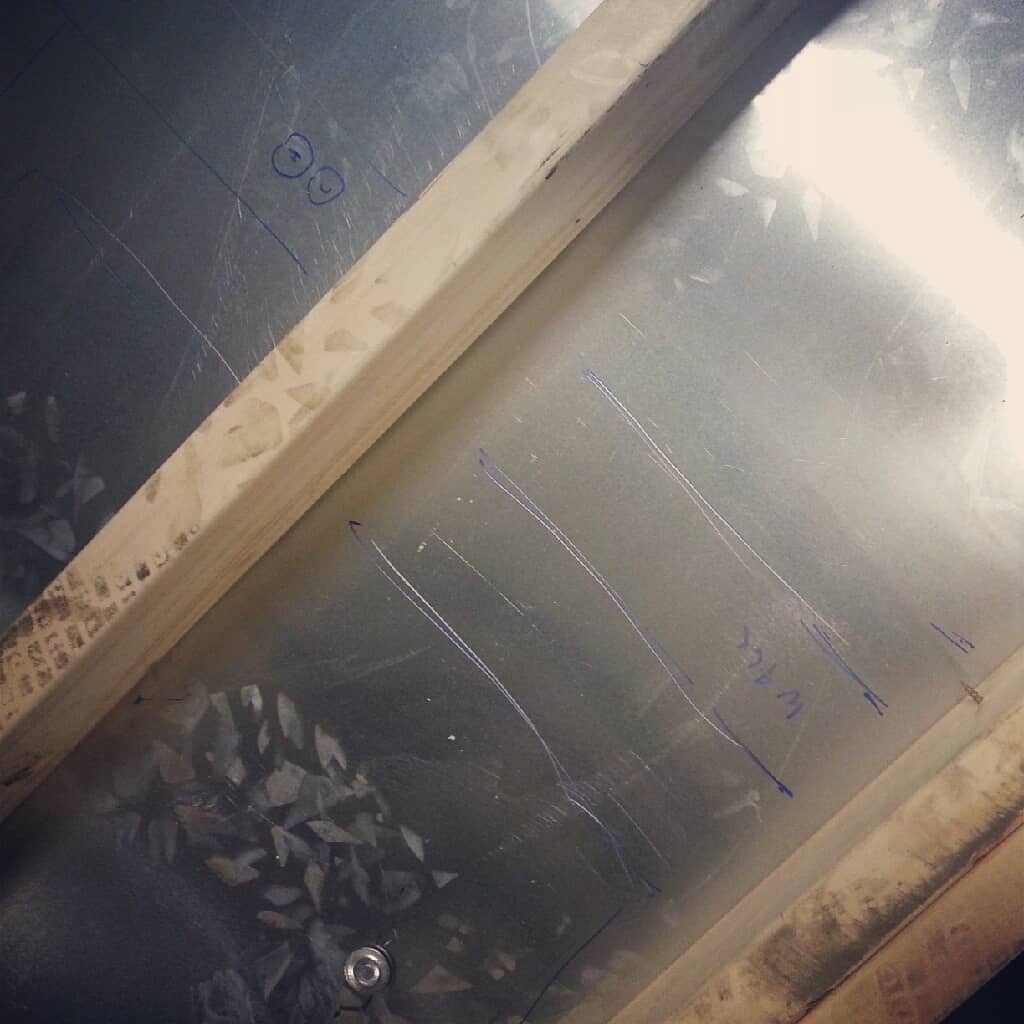
Placement of walls/plumbing
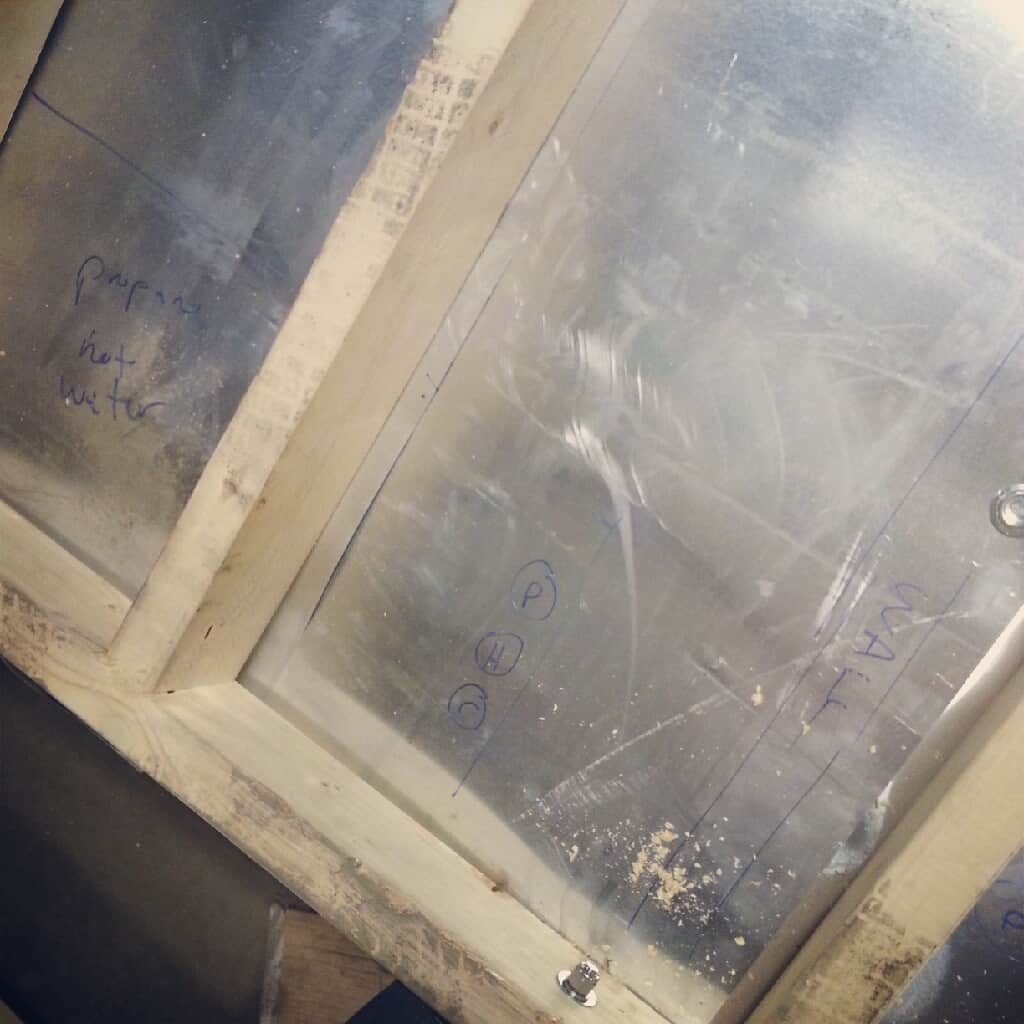
Placement of walls/plumbing
The first few days were fun putting the miter saw to good use. The last two were less fun, squeezed in the dirty, dark space under the trailer, drilling holes and ratcheting for hours to insert so many bolts. My added brackets and my desire to have the aluminum extend beyond the trailer deck to wrap around the framing made things more difficult and time consuming. Lifting the finished framing sections in and out of place (to be fit to within maybe a 1/16th of an inch inside the custom brackets) was a big challenge, as was the work under the trailer, managing a drill, changing bits, changing ratchet extensions to fit within trailer framing, plus keeping track of all the bolts, washers, etc. (All the while trying not to get sawdust in my eyes or drop the drill or ratchet on my face -- this only happened a few times!). An automotive dolly to help slide in and out from under the trailer would have really helped here!
Now I'm off the store to get some plumbing supplies to start the rough plumbing in the floor. Once the plumbing is in I can spray foam the whole thing and top it with 3/4" sheathing. Then wall framing begins!

I wonder if you have any engineering type thoughts on increasing the width of my tumbleweed trailer 6" on both sides. The major difference as I see it between your trailer and mine is that the subfloor is already built in to my trailer, there is welded on metal sheeting to the bottom of the c channel and tubing, and then one puts in insulation, down btwn the C channel and then lays plywood on top. I realize, after seeing this post, that your brackets are holding a subfloor, not just the actual wall, so the wall weight is diffused over the floor joists. I will have 3/4 Advantech (unless anyone can recommend a non-toxic, cheap, AND great performing material...) flooring on top of the built in "subfloor" of the trailer, and over either angle iron/ tubing/ brackets (like you have) and then the wall/ bottom plate against the Advantech. So, to recap, on the periphery of my trailer would only be phantom addition (welded metal), thin layer of sill insulation, Advantech, sill plate of studded wall. Your design effectively cantilevered out because you have a subfloor on TOP of the trailer. So I guess my question is, 1)did your design hold up well, and 2) has anyone added on to a Tumbleweed style (subfloor included/ sunk) trailer/ if so how'd it hold up? Thanks.
Hi Crystal,
I see what you are saying. To be perfectly honest, I've never much liked the style of trailers where you build the subfloor into them. Yes you can save a few inches, but if you get drop-axels on your trailer, then you can build on top, which makes for a much better insulated floor with far less thermal bridging on the bottom corners below the bottom plate -- and it allows you build wider if you want. Tumbleweed is not the only one who makes trailers like this (most all tiny house trailers seems to be made this way, these days) so I'm sure many people have dealt with this issue. I don't know of anyone personally. I would suggest joining these groups and asking: https://www.facebook.com/groups/tinyhousepeople and https://www.facebook.com/groups/1550659795184230/ To answer your question: Yes, my design has performed perfectly so far. Structurally it's very sound, and with the brackets added to my trailer, the weight of the walls is fully supported.
In your plans you mention using Pressure Treated Lumber in your subfloor, but elsewhere I read that was not a good idea due to off-gassing and other issues. Can you write about that?
Hi Astraea. I think you can go either way. The plans mention pressure treated just to be safe, depending on exactly what kind of trailer you have and how you finish the bottom of the subfloor framing to protect from moisture, etc. I actually didn't use pressure treated lumber myself, because I felt the way I had wrapped the whole thing in aluminum flashing was good enough. If you are concerned about off-gassing then don't use it and just make sure that the bottom of the house is protected from the elements.
What type of aluminum flashing did you purchase for your subfloor, and where did you get it? Thanks!
Hi Brenna -- I just used a standard aluminum flashing that comes in roles, meant for roofing (might be called valley flashing). I got it my small, local building supply store. I think mine was 24" wide and came in rolls 50' long.